Assembly Language Programming: Difference between revisions
| (95 intermediate revisions by the same user not shown) | |||
| Line 1: | Line 1: | ||
==Useful Links for the Assembly Language Programming Class== |
|||
===ARM7 Links=== |
|||
*[http://people.wallawalla.edu/~larry.aamodt/cptr215/cptr215.html Dr. Aamodt's Assembly Language Web Page] |
|||
*[http://www.eng.auburn.edu/~nelson/courses/elec5260_6260/ARM_AssyLang.pdf ARM Assembly Language Programming], a free book by Knaggs and Welsh (2004 Edition). This book is quite useful. It is a better as a reference than our text. |
|||
*[http://home.cc.umanitoba.ca/~umzhouc/arm.html Another text in html format.] |
|||
*[http://www.ic.unicamp.br/~ranido/mc404/arm/arm-instructionset.pdf The ARM Instruction Set], a good reference work. |
|||
*[ftp://entc.tamu.edu/ENTC349/Reference%20Material/ARM/ARM%20Assembly%20Language%20-%20Knaggs%20&%20Welsh.pdf Knaggs and Welsh (2008 Edition)]. |
|||
*[http://www.heyrick.co.uk/assembler/qfinder.html ARM Instruction Set Quick Finder] |
|||
*[http://ozark.hendrix.edu/~burch/cs/230/arm-ref.pdf ARM Instructions Quick Reference Card] |
|||
*[http://www.keil.com/support/man/docs/armasm/ Keil ARM Assembler Manual] |
|||
*[http://www.altera.com/literature/third-party/archives/ddi0100e_arm_arm.pdf This reference tells in more detail what happens to the flags, etc. for each instruction.] |
|||
*[https://en.wikipedia.org/wiki/Bitwise_operation Bit Operations Explained] |
|||
*[[Code Examples from Class]] |
|||
*[http://www.microbuilder.eu/Tutorials/LPC2148.aspx Using the I/O on the LPC2148] |
|||
*[http://www.nxp.com/documents/application_note/AN10216.pdf I2C Interfacing and comparison of serial protocols] |
|||
*[http://infocenter.arm.com/ The ARM Info Center] is a good reference site. |
|||
*[http://people.wallawalla.edu/~larry.aamodt/cptr215/docs/arm/arm_7tdmi_arch.pdf The ARM7 Reference Manual] is the go to reference. |
|||
*[http://people.wallawalla.edu/~larry.aamodt/cptr215/campus-only/lpc2148_uguide_ver3_0_rev_c.pdf The Embedded Arts Board of Education Reference Manual] gives the details of the board we are using in class. |
|||
*[http://people.wallawalla.edu/~larry.aamodt/cptr215/docs/arm/nxp_lpc214x_um.pdf LPC214x Reference Manual] This guide is immensely useful for programming the peripherals. |
|||
*[http://infocenter.arm.com/help/index.jsp?topic=/com.arm.doc.dui0489c/index.html ARM Compiler Toolchain Reference Manual] |
|||
*[https://www.scss.tcd.ie/~waldroj/3d1/arm_arm.pdf ARM Reference Manual] Section A of this manual is the most use. |
|||
====Raspberry Pi==== |
|||
Depending on the version, your pi may use ARM6 or ARM7. There is actually quite a lot of good assembly language information for programming the raspberry pi. |
|||
*[http://www.microdigitaled.com/ARM/ASM_ARM/Software/ARM_Assembly_Programming_Using_Raspberry_Pi_GUI.pdf This document shows how to use gnu tools from the command line (even over ssh if you have no display handy) and then how to use the Code::Blocks IDE for Raspberry Pi Assembly programming.] This also seems to apply to the Odroid C1 board running Ubuntu and probably other Odroid boards as well. |
|||
==TI MSP430 Links== |
|||
====Code Examples from Class==== |
|||
*[[MSP430 C Code Examples from Class]] |
|||
*[[MSP430 Assembly Code Examples from Class]] |
|||
*[https://en.wikipedia.org/wiki/TI_MSP430 MSP430 Family Details] This is a good quick overview of the MSP430. |
*[https://en.wikipedia.org/wiki/TI_MSP430 MSP430 Family Details] This is a good quick overview of the MSP430. |
||
*[http://robotics.hobbizine.com/asmlau.html A MSP430 Assembly Language Tutorial] |
|||
*[http://www.physics.mcmaster.ca/phys3b06/MSP430/Instruction_Set.pdf MSP430 Family Instruction Set Details] This is a good way to find out what each instruction is actually doing. It has the abbreviated instructions information, but then after that are the gory details we all need, especially when first learning the MSP430 assembly language. |
*[http://www.physics.mcmaster.ca/phys3b06/MSP430/Instruction_Set.pdf MSP430 Family Instruction Set Details] This is a good way to find out what each instruction is actually doing. It has the abbreviated instructions information, but then after that are the gory details we all need, especially when first learning the MSP430 assembly language. |
||
**[http://www.compendiumarcana.com/forumpics/MSP430%20Family%20Architecture%20Guide%20and%20Module%20Library.pdf MSP430 Family Archatecture and Module Guide (The manual that the above Instruction Set Details came from).] This was written before the MSP430X processors like our MSP430F5529 were conceived, so some data is outdated. |
**[http://www.compendiumarcana.com/forumpics/MSP430%20Family%20Architecture%20Guide%20and%20Module%20Library.pdf MSP430 Family Archatecture and Module Guide (The manual that the above Instruction Set Details came from).] This was written before the MSP430X processors like our MSP430F5529 were conceived, so some data is outdated. |
||
*[http://harijohnkuriakose.blogspot.com/2010/10/addressing-modes-in-msp430-family.html Addressing Modes of the MSP430 Family] |
*[http://harijohnkuriakose.blogspot.com/2010/10/addressing-modes-in-msp430-family.html Addressing Modes of the MSP430 Family] |
||
===Toolchain=== |
|||
====Other Course Materials for the MSP430 Family==== |
|||
There are various toolchains (build tools) for the MSP430. TI provides the Code Composer Studio (both desktop, and browser based) toolchain. At this point, the desktop version is much more powerful than the browser based version, and you need it for this class. There are also some other toolchains that cost something, but I prefer Code Composer Studio. |
|||
====Code Composer Studio==== |
|||
*[http://processors.wiki.ti.com/index.php/Download_CCS CCS] will work with Linux and Windows, and now a [https://e2e.ti.com/blogs_/b/toolsinsider/archive/2015/03/20/code-composer-studio-beta-for-msp430 beta] is available for OS X. |
|||
**To install CCSV6.1 on Ubuntu 15.04, you need to |
|||
$ unset JAVA_TOOL_OPTIONS |
|||
before running the installer. There is some more information for Linux installs [http://processors.wiki.ti.com/index.php/Linux_Host_Support_CCSv6 here.] I also found out that installing Grace from the App Center makes the App Center blank thereafter, unless you reinstall CCSV6.1. |
|||
*[http://www.ti.com/general/docs/lit/getliterature.tsp?baseLiteratureNumber=slau157 Code Composer Studio 6 for MSP430 User's Guide] |
|||
*[https://www.youtube.com/playlist?list=PL3NIKJ0FKtw67hHMKWN2xBfecpei-1wVg 73 Short Videos on using Code Composer Studio] |
|||
*[https://dev.ti.com/ TI Cloud Tools] This includes CCS Cloud which allows you to compile ,flash, and even debug. It seems to be under rather rapid development, so though it is missing a number of features of the local IDE, it may receive those any time. |
|||
*[https://code.google.com/p/osx-launchpad/ OS X Native Toolchain Installer] (You may prefer the Code Composer Studio Beta linked above.) |
|||
=====MSP430 Assembly using the TI Assembler===== |
|||
*[http://www.ti.com/lit/pdf/slau131 Assembly Language Tools] This manual also has some good data on the linker, including the section "Using Linker Symbols in C/C++ Applications". |
|||
*[https://students.cs.byu.edu/~cs224ta/references/Code%20Composer%20Studio/asm/MSP430%20Assember%20Directives.pdf Assembler Directives] |
|||
=====MSP430 TI C Compiler===== |
|||
*[http://www.ti.com/lit/ug/slau132j/slau132j.pdf MSP430 Optimizing C/C++ Compiler] (See Section 6.5 and following for how to mix C/C++ and Assembly. It is really best to read the entire chapter though, as it is all pertinent to mixing C and Assembly. It will also help you if you want to program in C, as it tells how the C compiler uses the memory, the stack, the registers, etc., and once you understand the processor as you learn to do when you learn its assembly language, it is very interesting to see how that all works in C.) |
|||
**[http://processors.wiki.ti.com/index.php/Printf_support_for_MSP430_CCSTUDIO_compiler Here] is how to use printf() statements with Code Composer Studio. |
|||
**[http://people.wallawalla.edu/~rob.frohne/ClassHandouts/Assembly/example_workspace.zip TI C Examples Workspace] This is a CCS workspace with all the C examples from TI for the MSP430F5529. It is useful to work around a bug in MSPWare that broke the feature that you could use in the Examples to create an instance of an example in your workspace. You can import projects from this workspace into your regular one, so you don't have to switch workspaces to see the examples. You can read the descriptions for these examples in the Examples feature of Code Composer Studio. You just can't import them into your workspace until TI fixes the bug. When they do, this will no longer be useful. Soon I hope! |
|||
=====IAR Tools===== |
|||
IAR also makes a toolchain. It is not free, but you will sometimes find code that was developed for it, and it is slightly different from that developed for Code Composer Studio using either the TI or GCC compilers/assemblers. |
|||
*[http://processors.wiki.ti.com/index.php/IAR_to_CCS_ASM_Perl_Script This is a perl script] to convert IAR assembly code to TI assembly code. |
|||
=====GCC Compiler===== |
|||
You may use the GCC compiler from within Code Composer Studio. It is not limited in the size of the code that it can compile. There are some differences between it and the TI compiler. I find that the TI compiler usually works more easily, with TI examples especially. |
|||
*[http://e2e.ti.com/support/wireless_connectivity/f/968/p/388802/1373125#1373125 Some notes on getting the GCC compiler to work with the CC3100....] |
|||
*[https://gist.github.com/RickKimball/1303030 An Example of Assembly with the GCC Compiler] |
|||
*[http://mspgcc.sourceforge.net/manual/x1522.html Generate the assembly code with GCC] |
|||
*[http://mspgcc.sourceforge.net/manual/c1308.html Inline Assembly with GCC] |
|||
**[https://gist.github.com/RickKimball/1643162 An Example of Inline Assembly with GCC] |
|||
**[http://stackoverflow.com/questions/16354348/how-to-pass-variables-to-intel-format-inline-asm-code-compiled-with-gcc Passing variables to inline assembly from C with GCC] |
|||
**[http://stackoverflow.com/questions/3898435/labels-in-gcc-inline-assembly Labels in inline assembly with GCC] |
|||
To make your program using interrupt service routines compile with either the TI or the GCC compiler, you need some #ifdef's like this: |
|||
<nowiki> |
|||
#if defined(__TI_COMPILER_VERSION__) || defined(__IAR_SYSTEMS_ICC__) |
|||
#pragma vector=USCI_A0_VECTOR |
|||
__interrupt void USCI_A0_ISR(void) |
|||
#elif defined(__GNUC__) |
|||
void __attribute__ ((interrupt(USCI_A0_VECTOR))) USCI_A0_ISR (void) |
|||
#else |
|||
#error Compiler not supported! |
|||
#endif </nowiki> |
|||
Note that you need to substitute the appropriate ISR vectors in your code. |
|||
====C Language References==== |
|||
*[https://hassanolity.files.wordpress.com/2013/11/the_c_programming_language_2.pdf Kerningham & Richie's famous book], The C Programming Language. |
|||
=====Translating Embedded Code Between Assembly and C===== |
|||
When reading C code to understand what you wish to do in Assembly, or vice versa, it is handy to understand some common statements you see in C. Listed below are the most commonly seen ones. |
|||
<nowiki> |
|||
P1DIR |= #BIT0; //is the same as bis.b #BIT0, &P1DIR |
|||
P1DIR &= ~#BIT0; //is the same as bic.b #BIT0, &P1DIR |
|||
P1DIR ^= #BIT0; //is the same as xor.b #BIT0, &P1DIR</nowiki> |
|||
===MSP430F5529 Specific Data=== |
|||
*[http://www.ti.com/lit/pdf/SLAU208 MSP430x5xx and MSP430x6xx Family User's Guide] This is the most important reference for the MSP430F5529. Read it carefully (as a reference). |
|||
*[http://www.ti.com/lit/ds/symlink/msp430f5529.pdf MSP430F5529 Data Sheet] |
|||
*[http://www.ti.com/product/msp430f5529 TI web page on the MSP430F5529] |
|||
**[[MSP430F5529 Memory Map]] is in the ti/ccsv6/ccs_base/msp430/include/msp430f5529.cmd file. |
|||
**[http://mostlyanalog.blogspot.com/2015/04/clocking-msp430f5529-launchpad.html Setting the clock frequency for the MSP430F5529 Launchpad] |
|||
**[https://e2e.ti.com/support/microcontrollers/msp430/f/166/p/294330/1026499 Some notes on porting MSP430G2553 code to the MSP430F5529]. Here is a [http://www.ti.com/lit/an/slaa396/slaa396.pdf TI App Note on the differences between the 5xxx and the previous MSP430 processors.] Note: There are differences in the following: |
|||
***The F5xxx has USB and a bunch more features. |
|||
***The F5xxx doesn't have PxSEL2, and the PxSEL need to be adjusted because of different pinouts. I find pages 25-28 of the [http://www.ti.com/lit/ug/slau533c/slau533c.pdf MSP430F5529 Launchpad Manual] useful for these conversions. |
|||
***The PMM ([https://focus.ti.com/en/download/mcu/Understanding-the-New-'5xx-Integrated-Power-Management-Modul.pdf Power Management Module]), particualarly the Digitally Controlled Oscillator (DCO) and Frequency Locked Loop (FLL) of the clock system is significantly different. |
|||
***The USCI (UART, SPI and I2C serial communications) Interrupts have been consolidated. For example see section 39.3.15 of the [http://www.ti.com/lit/ug/slau208o/slau208o.pdf MSP430x5xx and MSP430x6xx Family User's Guide]. |
|||
***The MSP430F5529 has more than 128K of memory. The normal 16 bits will only allow accessing the first 64K. To access the rest it uses 20 bits. This is enabled with the [http://www.ti.com/lit/ml/slap109/slap109.pdf Extended Instructions] like MOVX.W. For class, we can get by with the lower 64K just fine and can ignore these extended instructions, however, good programming practice calls for using CALLA, RETA, and BRA instead of CALL, RET, and BR. If you want to use the rest of the memory sometime, look into [http://www.ti.com/lit/ml/slap109/slap109.pdf this]. If you want C you compile to make assembly without using the extended instructions using CCSv6, tell it to use the msp instructions instead of mspx in the Build->MSP430 Compiler->Processor Options. |
|||
*[http://embedded.fm/blog/ese101-assembly-language-playground How to set up an assembly project in Code Composer Studio] |
|||
===Launchpad Evaluation Board Data=== |
|||
*[http://www.ti.com/tool/msp-exp430f5529lp MSP430F5529LP LaunchPad Evaluation Kit Resource Page] |
|||
**[http://processors.wiki.ti.com/index.php/MSP430F5529_LaunchPad TI MSP430F5529 Launchpad Wiki Page] This page has the nice pin out card that came with your Launchpad. |
|||
[[Image:EXP430PinOut.png|800px]] |
|||
**[http://www.ti.com/lit/pdf/slau533 MSP-EXP430F5529 Launchpad Development Kit User's Guide] |
|||
**[https://roboticsclub.org/redmine/projects/infotron/wiki/ProgramMSP430 Infotron Tutorials on Programming the MSP430 LaunchPads] |
|||
**[https://e2e.ti.com/support/microcontrollers/msp430/f/166/p/362204/1366058#1366058 How to program other MSP430s with your Launchpad] |
|||
===Code Examples from Class=== |
|||
*[[MSP430 C Code Examples from Class]] |
|||
*[[MSP430 Assembly Code Examples from Class]] |
|||
===Slides and Videos 2015 and 2016=== |
|||
These slides were modified from [https://students.cs.byu.edu/~clement/cs224/ Mark Clement's work] at BYU. The slides are the major categories, and the videos explaining the slides are the sub-categories. |
|||
*[https://docs.google.com/presentation/d/1ZAJa7nfYve2G3PFH1gkVn37F2I9NFj1neebtDwEIcWw/edit?usp=sharing Digital Logic] |
|||
**[https://www.youtube.com/watch?v=6zYMtpc19To Arithmetic and Logical Operations] |
|||
**[https://www.youtube.com/watch?v=RXFzZrLW7gU Transistors Make a Digital Gate] |
|||
**[https://www.youtube.com/watch?v=3qMrlef2B5M Translating Between Truth Tables, Logic Diagrams and Boolean Equations] |
|||
**[https://www.youtube.com/watch?v=SEVz5cJGEco Commonly Used Combinational Logic] |
|||
**[https://www.youtube.com/watch?v=pED3BPH48po Logical Completeness] |
|||
**[https://www.youtube.com/watch?v=wbJ6C1VYI6M Sequential Logic, Latches, Registers and Memory] |
|||
**[https://www.youtube.com/watch?v=w7WIljwihx0 Finite State Machines] |
|||
**[https://www.youtube.com/watch?v=_3X_fY8U9ps Finite State Machine Examples] |
|||
**[https://www.youtube.com/watch?v=820Lzv-YbIo Finite State Machine Design] |
|||
*[https://docs.google.com/presentation/d/1PHnaBUnKk8dyQxim5enwB9Gp5cNodBPDUHgdSL3cCZs/edit?usp=sharing Data Types] |
|||
**[https://www.youtube.com/watch?v=oGCLHiuqCC8 Introduction to Data Types] |
|||
**[https://www.youtube.com/watch?v=z4LZK9F9vdQ Integer Data Types] |
|||
**[https://www.youtube.com/watch?v=a-lMQqACe7s Two's Complement Operations] |
|||
**[https://www.youtube.com/watch?v=1LY0XL_aBMk More Two's Compliment] |
|||
**[https://www.youtube.com/watch?v=lv3AUV4DPks Floating Point Numbers] |
|||
**[https://www.youtube.com/watch?v=g_Zaj08C6_k More Floating Point Numbers] |
|||
**[https://www.youtube.com/watch?v=mb5_tWNLvgo MSP430 Variable Types] |
|||
**[https://www.youtube.com/watch?v=1noa649ZrCo MSP430 Data Types With Code Composer Studio] |
|||
*[https://docs.google.com/presentation/d/1kQtUpDR6W9vrX_ynbJBkqr3YDJ8Of2p3v8rZ__KBOT0/edit?usp=sharing Instruction Set Archatecture] |
|||
**[https://www.youtube.com/watch?v=KOyMWYE37tQ Introduction to the MSP430 Instruction Set Architecture] |
|||
**[https://www.youtube.com/watch?v=cfr9megyJbc MSP430 Assembly Language Primer] |
|||
**[https://www.youtube.com/watch?v=DuFMeuq7TrE MSP430 Addressing Modes] |
|||
**[https://www.youtube.com/watch?v=rs-1BBB7bgw MSP430 Source Addressing Modes] |
|||
**[https://www.youtube.com/watch?v=OASKoYCmt4s What Happens When Using Different MSP430 Addressing Modes?] |
|||
**[https://www.youtube.com/watch?v=caVzQHtRTJU Processor Speed and Addressing] |
|||
**[https://www.youtube.com/watch?v=eAmSnTxQscE MSP430 Dissassembly] |
|||
**[https://youtu.be/BX1yrDql0dc How Addressing Modes and Data Types Work Seen With Code Composer Studio] |
|||
*[https://docs.google.com/presentation/d/1ACTf-Zq4V4bnyx_LhH-8teLWX5rASnwA0cyXgWmNdps/edit?usp=sharing Assembler & Linker] |
|||
**[https://www.youtube.com/watch?v=d39hR-8EdZw MSP430 Assembly Instructions] |
|||
**[https://www.youtube.com/watch?v=v4PxLGp-M_4 The MSP430 Assembler] |
|||
**[https://www.youtube.com/watch?v=krFlLSrhlMM MSP430 Assembler Sections] |
|||
**[https://www.youtube.com/watch?v=7BJx3Q_KBEs How to Code in MSP430 Assembly Language] |
|||
**[https://www.youtube.com/watch?v=Hre8Hi0CdEA Systematic Decomposition] |
|||
*[https://docs.google.com/presentation/d/1MJHG2y6pGId_p6oXRMH5MDT7R-f97edcsF-gNZcIY8s/edit?usp=sharing General Purpose I/O] |
|||
**[https://www.youtube.com/watch?v=nGOVhMgBndM MSP430 General Purpose I/O] |
|||
**[https://youtu.be/xXmmvBfy_5Q Using Code Composer Studio to Program in Assembler the MSP430F5529 Launchpad to Blink] |
|||
*[https://docs.google.com/presentation/d/1gIL60nq5ki-ELgj_g58eumiSWD0NZoCbvKA08YZgBC8/edit?usp=sharing Stacks] |
|||
**[https://www.youtube.com/watch?v=6DNFKqPSpLM Introduction to Stacks] |
|||
**[https://www.youtube.com/watch?v=pMBFTw6ykKs MSP430 Subroutines] |
|||
**[https://www.youtube.com/watch?v=ucmj2-HzF08 Caller Versus Callee Save] |
|||
**[https://www.youtube.com/watch?v=3P905zl9ts4 MSP430 Subroutine Activation Records] |
|||
*[https://docs.google.com/presentation/d/12X0BrSMwMd0NYRTiNjDM53-rXRalb3xAW5FGTZcUaYs/edit?usp=sharing MSP430 Interrupts, Clocks, Timers, and PWM] |
|||
**[https://youtu.be/cPlxv9R7tZQ Introduction to MSP430 Interrupts] |
|||
**[https://youtu.be/KtVDqvW0Vfw Timers on the MSP430] |
|||
*[https://docs.google.com/presentation/d/1nuK6rDJ8Yly6MJs1o4boKR41_S37C-Q1Q6u7JHu2fmk/edit?usp=sharing Serial Communications] |
|||
**[https://youtu.be/2sObuUtpIq4 Serial Communications Video] |
|||
*[https://docs.google.com/presentation/d/1O4cqBvtdO7lM5ywjRPBVJ7o4X1axtpwTqYkL9-y4UCA/edit?usp=sharing Using Flash] |
|||
====Quiz Answers==== |
|||
*[[Quiz 6.1]] |
|||
*[[Quiz 6.2]] |
|||
*[[Quiz 6.3]] |
|||
*[[Quiz 6.4]] |
|||
===Materials for the MSP430 Family from Other Courses=== |
|||
*[http://www.ece.utep.edu/courses/web3376/Notes.html Notes from the University of Texas at El Paso (UTEP)] The EE3376 class. |
*[http://www.ece.utep.edu/courses/web3376/Notes.html Notes from the University of Texas at El Paso (UTEP)] The EE3376 class. |
||
**[http://www.ece.utep.edu/courses/web3376/Notes_files/ee3376-information.pdf Binary Numbering Systems and Operations] |
**[http://www.ece.utep.edu/courses/web3376/Notes_files/ee3376-information.pdf Binary Numbering Systems and Operations] |
||
| Line 53: | Line 158: | ||
*[http://ece382.com/ ECE382, a good self learning site for the MSP430] |
*[http://ece382.com/ ECE382, a good self learning site for the MSP430] |
||
*[https://www.edx.org/course/electronic-interfaces-bridging-physical-uc-berkeleyx-ee40lx-0?utm_source=Course+Announcements+Mailing+List&utm_medium=email&utm_content=button&utm_campaign=Student_Newsletter_July_14#! Berkeley's MOOC] where they build a robot using the MSP430 Launchpad (G2 version). |
*[https://www.edx.org/course/electronic-interfaces-bridging-physical-uc-berkeleyx-ee40lx-0?utm_source=Course+Announcements+Mailing+List&utm_medium=email&utm_content=button&utm_campaign=Student_Newsletter_July_14#! Berkeley's MOOC] where they build a robot using the MSP430 Launchpad (G2 version). |
||
*[http://robotics.hobbizine.com/asmlau.html A Beginner's MSP430 Assembly Language Tutorial] |
|||
*[http://inflab.et.fh-duesseldorf.de/mitarbeiter/TdT/MSP430_LaunchPad_Workshop_v2.21.pdf Launchpad Workshop] |
*[http://inflab.et.fh-duesseldorf.de/mitarbeiter/TdT/MSP430_LaunchPad_Workshop_v2.21.pdf Launchpad Workshop] |
||
*[https://courses.cs.washington.edu/courses/cse466/11au/calendar/04-Interrupts-posted.pdf Interrupts] |
*[https://courses.cs.washington.edu/courses/cse466/11au/calendar/04-Interrupts-posted.pdf Interrupts] |
||
*[http://processors.wiki.ti.com/index.php/MSP430_LaunchPad_PushButton Using Port Pin Interrupts] |
*[http://processors.wiki.ti.com/index.php/MSP430_LaunchPad_PushButton Using Port Pin Interrupts] |
||
**[http://referencedesigner.com/blog/msp430-interrupt-rising-and-falling-edge/2089/ Rising or Falling Edge Settings] |
**[http://referencedesigner.com/blog/msp430-interrupt-rising-and-falling-edge/2089/ Rising or Falling Edge Settings] |
||
*[http://www.ece.utep.edu/courses/web3376/Notes_files/ee3376-timer.ppt.pdf TimerA Presentation] |
|||
*[http://processors.wiki.ti.com/index.php/IAR_to_CCS_ASM_Perl_Script A script to convert IAR assembly programs to CCS and vice versa] |
|||
*[https://students.cs.byu.edu/~cs224ta/references/LaunchPad/LaunchPad%20MSP430%20Assembly%20Language%20Tutorial.docx MSP430 Assembly Language Tutorial] |
*[https://students.cs.byu.edu/~cs224ta/references/LaunchPad/LaunchPad%20MSP430%20Assembly%20Language%20Tutorial.docx MSP430 Assembly Language Tutorial] |
||
*[http://ece.uprm.edu/~ahchinaei/courses/2014jun/inel4206/Inel4206Ch4Part1Rogelio4Slides.pdf Assembly Language Lecture] I like the looping flow charts and their equivalents in assembly. |
*[http://ece.uprm.edu/~ahchinaei/courses/2014jun/inel4206/Inel4206Ch4Part1Rogelio4Slides.pdf Assembly Language Lecture] I like the looping flow charts and their equivalents in assembly. |
||
| Line 69: | Line 173: | ||
**[http://userweb.eng.gla.ac.uk/john.davies/mspbook/jhdoddans.pdf Solutions to odd problems in Davies' book] |
**[http://userweb.eng.gla.ac.uk/john.davies/mspbook/jhdoddans.pdf Solutions to odd problems in Davies' book] |
||
**[https://github.com/adamcohen/msp430-ccs-examples Example Code from Davies' book ported to Code Composer Studio] |
**[https://github.com/adamcohen/msp430-ccs-examples Example Code from Davies' book ported to Code Composer Studio] |
||
*[http://www.ti.com/lit/an/slaa334a/slaa334a.pdf How Flash works, and how you can write to it from your program.] |
|||
====Slides 2015==== |
|||
*[http://wiki.tiprocessors.com/index.php/MSP430_LaunchPad_Tutorials MSP430 LaunchPad Tutorials] |
|||
These slides were modified from [https://students.cs.byu.edu/~clement/cs224/ Mark Clement's work] at BYU. |
|||
*[http://teaching.idallen.com/dat2343/10f/notes/040_overflow.txt The carry (C) and overflow (V) flags explained.] |
|||
*[https://docs.google.com/presentation/d/1ZAJa7nfYve2G3PFH1gkVn37F2I9NFj1neebtDwEIcWw/edit?usp=sharing Digital Logic] |
|||
*[https://docs.google.com/presentation/d/1PHnaBUnKk8dyQxim5enwB9Gp5cNodBPDUHgdSL3cCZs/edit?usp=sharing Data Types] |
|||
*[https://docs.google.com/presentation/d/1kQtUpDR6W9vrX_ynbJBkqr3YDJ8Of2p3v8rZ__KBOT0/edit?usp=sharing Instruction Set Archatecture] |
|||
*[https://docs.google.com/presentation/d/1ACTf-Zq4V4bnyx_LhH-8teLWX5rASnwA0cyXgWmNdps/edit?usp=sharing Assembler & Linker] |
|||
*[https://docs.google.com/presentation/d/1MJHG2y6pGId_p6oXRMH5MDT7R-f97edcsF-gNZcIY8s/edit?usp=sharing General Purpose I/O] |
|||
*[https://docs.google.com/presentation/d/1gIL60nq5ki-ELgj_g58eumiSWD0NZoCbvKA08YZgBC8/edit?usp=sharing Stacks, Interrupts, Clocks, Timers, and PWM] |
|||
*[https://docs.google.com/presentation/d/1nuK6rDJ8Yly6MJs1o4boKR41_S37C-Q1Q6u7JHu2fmk/edit?usp=sharing Serial Communications] |
|||
===Project Related Links and Notes=== |
|||
====Toolchain==== |
|||
=====Code Composer Studio===== |
|||
*[http://processors.wiki.ti.com/index.php/Download_CCS CCS] will work with Linux and Windows, and now a [https://e2e.ti.com/blogs_/b/toolsinsider/archive/2015/03/20/code-composer-studio-beta-for-msp430 beta] is available for OS X. |
|||
**To install CCSV6.1 on Ubuntu 15.04, you need to |
|||
$ unset JAVA_TOOL_OPTIONS |
|||
before running the installer. There is some more information for Linux installs [http://processors.wiki.ti.com/index.php/Linux_Host_Support_CCSv6 here.] I also found out that installing Grace from the App Center makes the App Center blank thereafter, unless you reinstall CCSV6.1. |
|||
*[http://www.ti.com/general/docs/lit/getliterature.tsp?baseLiteratureNumber=slau157 Code Composer Studio 6 for MSP430 User's Guide] |
|||
*[https://www.youtube.com/playlist?list=PL3NIKJ0FKtw67hHMKWN2xBfecpei-1wVg 73 Short Videos on using Code Composer Studio] |
|||
*[https://dev.ti.com/ TI Cloud Tools] This includes CCS Cloud which allows you to compile ,flash, and even debug. It seems to be under rather rapid development, so though it is missing a number of features of the local IDE, it may receive those any time. |
|||
*[https://code.google.com/p/osx-launchpad/ OS X Native Toolchain Installer] (You may prefer the Code Composer Studio Beta linked above.) |
|||
=====MSP430 Assembly using the TI Assembler===== |
|||
*[http://www.ti.com/lit/ug/slau131i/slau131i.pdf Assembly Language Tools] This manual also has some good data on the linker, including the section "Using Linker Symbols in C/C++ Applications". |
|||
*[https://students.cs.byu.edu/~cs224ta/references/Code%20Composer%20Studio/asm/MSP430%20Assember%20Directives.pdf Assembler Directives] |
|||
=====MSP430 TI C Compiler===== |
|||
*[http://www.ti.com/lit/ug/slau132j/slau132j.pdf MSP430 Optimizing C/C++ Compiler] (See Section 6.5 and following for how to mix C/C++ and Assembly. It is really best to read the entire chapter though, as it is all pertinent to mixing C and Assembly. It will also help you if you want to program in C, as it tells how the C compiler uses the memory, the stack, the registers, etc., and once you understand the processor as you learn to do when you learn its assembly language, it is very interesting to see how that all works in C.) |
|||
**[http://processors.wiki.ti.com/index.php/Printf_support_for_MSP430_CCSTUDIO_compiler Here] is how to use printf() statements with Code Composer Studio. |
|||
==== |
====2015 Robot and 2016 Car Information==== |
||
*[[Building Tips]] |
|||
*[http://e2e.ti.com/support/wireless_connectivity/f/968/p/388802/1373125#1373125 Some notes on getting the GCC compiler to work with the CC3100....] |
|||
*[https:// |
*[https://www.creatroninc.com/upload/L9110%20Datasheet.pdf L9110 H Bridge Data Sheet] |
||
**[http://www.petervis.com/modules/l9110-hg7881-dual-channel-stepper-motor-driver-board/l9110-hg7881-dual-channel-stepper-motor-driver-board.html HG7881 Dual H Bridge Module] This suggests putting the PWM signal on one input and the direction control on the other. If you do that, you need to invert the PWM input when you change directions as well. See the data sheet above. |
|||
*[http://mspgcc.sourceforge.net/manual/x1522.html Generate the assembly code with GCC] |
|||
**[https://www.bananarobotics.com/shop/How-to-use-the-HG7881-(L9110)-Dual-Channel-Motor-Driver-Module How to use the HG7881 (L9110) Dual Channel Motor Driver Module] This reference shows you actual arduino code that runs the dual channel H bridge. |
|||
*[http://mspgcc.sourceforge.net/manual/c1308.html Inline Assembly with GCC] |
|||
*[http://wiki.pinguino.cc/index.php/SPP_Bluetooth_Modules#HC-05.2C_HC-06_Hardware Bluetooth UART HC-05 and HC-06] |
|||
**[https://gist.github.com/RickKimball/1643162 An Example of Inline Assembly with GCC] |
|||
**[http://www.tec.reutlingen-university.de/uploads/media/DatenblattHC-05_BT-Modul.pdf HC Bluetooth Manual] |
|||
**[http://stackoverflow.com/questions/16354348/how-to-pass-variables-to-intel-format-inline-asm-code-compiled-with-gcc Passing variables to inline assembly from C with GCC] |
|||
**The bluetooth module for 2016 is a little different: |
|||
**[http://stackoverflow.com/questions/3898435/labels-in-gcc-inline-assembly Labels in inline assembly with GCC] |
|||
*** It uses the BK3231 IC and it's data sheet is [https://fccid.io/document.php?id=2672934 available from the FCC here.] |
|||
*[http://www.ti.com/lit/an/slaa334a/slaa334a.pdf How Flash works, and how you can write to it from your program.] |
|||
*** It is the SPP-C module described [http://www.martyncurrey.com/bluetooth-modules/ on this page.][[File:Bluetooth Carrier.jpg|600px]] |
|||
=====C Language References===== |
|||
*** Solder five pins on one side and three on the other to get your bluetooth module onto your carrier board. |
|||
*[https://hassanolity.files.wordpress.com/2013/11/the_c_programming_language_2.pdf Kerningham & Richie's famous book], The C Programming Language. |
|||
***[http://www.suptronics.com/downloads/BC04-B_AT%20Command.pdf These] are the AT commands which if you use them to configure your bluetooth have to be issued from the wired side (not from the phone). You can use them to change the name with "AT+NAME<Name you want to use instead of BT-04A>" where I found for me sending a line feed after this was needed. The name you want to call you bluetooth device is just typed after the AT+NAME, like AT+NAMERob if I want to call it Rob. I should note that I had some difficulty with this. I don't seem to know how to terminate the name, but this may get you started. It is not handy to have your bluetooth device named the same thing as everyone elses when you are in the same room trying to pair with it. |
|||
*** The baud rate to start with on these boards is 9600, 8N1. You need to send carriage return and line-feed both to get a response from the board. Remember that TX on one side is connected to RX on the other. The module identifies itself as BT04-A, and the PIN is 1234 over bluetooth. |
|||
**[[C example of using the USCI as a 9600 baud UART to communicate with the HC-06 bluetooth module for the MSP430F5529]]. To test this app, do not use Blueberry. The professor used [https://f-droid.org/wiki/page/ru.sash0k.bluetooth_terminal Bluetooth terminal] on f-droid. The source code is available at [https://github.com/Sash0k/bluetooth-spp-terminal github.] |
|||
====Evaluation Board Data==== |
|||
**[https://en.wikipedia.org/wiki/Newline Newline Characters, CR or CR+LF?] It is important to know what the computer you are communicating with uses. Linux and Unix use LF (\n or 0x0a ). Windows uses CR+LF (\r \n or 0x0d0a). Others use different combinations! |
|||
*[http://www.ti.com/tool/msp-exp430f5529lp MSP430 F5529 LaunchPad Evaluation Kit Resource Page] |
|||
*[https://github.com/Nurgak/Android-Bluetooth-Remote-Control Blueberry Android Bluetooth Remote Control App] |
|||
**[http://processors.wiki.ti.com/index.php/MSP430F5529_LaunchPad TI MSP430F5529 Launchpad Wiki Page] This page has the nice pin out card that came with your Launchpad. |
|||
*[http://www.hyzt.com/manager/upimg/hy301%E2%80%9407A.pdf HY301-07A Photo Interrupter Datasheet] From the datasheet, we will choose a forward current on the LED to be 5 mA because we don't want to waste batteries, and that is the lowest the data sheet shows it working. That leads us to a forward voltage across the diode of 1.3 volts. If we run things on 3.3 volts that gives us a voltage drop of 3.3-1.3=2.0 volts. Ohms law says a resistor of R=V/I=2volts/5mA = 400 ohms. We will pick 390 ohms since it is an available 5% value. For the phototransistor, we see that the current for the forward diode current we picked should be about 0.2 mA. If we want the output to drop to 0.5 volts with the LED on, that leaves 3.3 volts - 0.5 volts = 2.8 volts across the collector resistor, so using Ohm's Law again, we need a collector resistor of 2.8 volts/0.2mA = 14 Kohms, so we will pick 15 Kohms because it is a standard value. The 15 Kohm resistors are optional as you can use the built in ones on the MSP430 controlled by PREN. |
|||
**[http://www.ti.com/lit/pdf/slau533 MSP430 F5529 Development Kit User's Guide] |
|||
*I count 20 holes, on the encoder wheels. This gives 20 periods per revolution. The wheel diameter is about 0.066 meters, so the radius is 0.033 meters. This gives about 0.21 meters per revolution. It seems a pretty fast speed is about 1 meter per second, which means that we have about 5 revolutions per second, or 100 cycles per second, or about 0.01 seconds per period at high speed. |
|||
**[http://processors.wiki.ti.com/index.php/Download_CCS Download Code Composer Studio] |
|||
*[http://www.phidgets.com/docs/DC_Motor_and_Controller_Primer Applying Feedback] makes the robot easier to control. This web page gives a somewhat helpful primer on that process. |
|||
*[http://www.ti.com/product/msp430f5529 TI web page on the MSP430F5529] |
|||
**[http://www.ti.com/lit/ds/symlink/msp430f5529.pdf MSP430F5529 Data Sheet] |
|||
====CC3100 SimpleLink Wi-Fi Family==== |
|||
**[http://www.ti.com/lit/ug/slau208o/slau208o.pdf MSP430X5XXXX User's Guide] |
|||
**[http://people.wallawalla.edu/~rob.frohne/ClassHandouts/Assembly/example_workspace.zip TI C Examples Workspace] This is a CCS workspace with all the C examples from TI. |
|||
**[https://roboticsclub.org/redmine/projects/infotron/wiki/ProgramMSP430 Infotron Tutorials on Programming the MSP430 LaunchPads] |
|||
**[[MSP430F5529 Memory Map]] is in the ti/ccsv6/ccs_base/msp430/include/msp430f5529.cmd file. |
|||
**[http://mostlyanalog.blogspot.com/2015/04/clocking-msp430f5529-launchpad.html Setting the clock frequency for the F5529 Launchpad] |
|||
**[https://e2e.ti.com/support/microcontrollers/msp430/f/166/p/362204/1366058#1366058 How to program other MSP430s with your Launchpad] |
|||
**[https://e2e.ti.com/support/microcontrollers/msp430/f/166/p/294330/1026499 Some notes on porting MSP430G2553 code to the MSP430F5529]. Here is a [http://www.ti.com/lit/an/slaa396/slaa396.pdf TI App Note on the differences between the 5xxx and the previous MSP430 processors.] Note: There are differences in the following: |
|||
***The F5xxx has USB and a bunch more features. |
|||
***The F5xxx doesn't have PxSEL2, and the PxSEL need to be adjusted because of different pinouts. I find pages 25-28 of the [http://www.ti.com/lit/ug/slau533c/slau533c.pdf F5529 Launchpad Manual] useful for these conversions. |
|||
***The PMM ([https://focus.ti.com/en/download/mcu/Understanding-the-New-'5xx-Integrated-Power-Management-Modul.pdf Power Management Module]), particualarly the Digitally Controlled Oscillator (DCO) and Frequency Locked Loop (FLL) of the clock system is significantly different. |
|||
***The USCI (UART, SPI and I2C serial communications) Interrupts have been consolidated. For example see section 39.3.15 of the [http://www.ti.com/lit/ug/slau208o/slau208o.pdf F5xxx User Guide]. |
|||
***The MSP430F5529 has more than 128K of memory. The normal 16 bits will only allow accessing the first 64K. To access the rest it uses 20 bits. This is enabled with the [http://www.ti.com/lit/ml/slap109/slap109.pdf Extended Instructions] like MOVX.W. For class, we can get by with the lower 64K just fine and can ignore these extended instructions, however, good programming practice calls for using CALLA, RETA, and BRA instead of CALL, RET, and BR. If you want to use the rest of the memory sometime, look into [http://www.ti.com/lit/ml/slap109/slap109.pdf this]. |
|||
=====CC3100 SimpleLink Wi-Fi Family===== |
|||
*[http://www.ti.com/lit/ug/swru375a/swru375a.pdf CC3100 BoosterPack Getting Started Guide] |
*[http://www.ti.com/lit/ug/swru375a/swru375a.pdf CC3100 BoosterPack Getting Started Guide] |
||
*[http://www.ti.com/lit/wp/swry009/swry009.pdf A link to the Internet of Things Whitepaper] |
*[http://www.ti.com/lit/wp/swry009/swry009.pdf A link to the Internet of Things Whitepaper] |
||
| Line 136: | Line 209: | ||
**[http://e2e.ti.com/support/wireless_connectivity/f/968/p/387348/1369052#1369052 How to Build for the CC3100 using Linux] |
**[http://e2e.ti.com/support/wireless_connectivity/f/968/p/387348/1369052#1369052 How to Build for the CC3100 using Linux] |
||
*[http://people.wallawalla.edu/~Rob.Frohne/for_ti/ Here are the files for compiling SimpleLink using the GCC compiler.] |
*[http://people.wallawalla.edu/~Rob.Frohne/for_ti/ Here are the files for compiling SimpleLink using the GCC compiler.] |
||
====2014 Robot Information==== |
====2014 Robot Information==== |
||
*[http://www.lynxmotion.com/images/data/hsr1425cr.pdf HSR-1425CR Continuous Rotation Servo Datasheet] |
*[http://www.lynxmotion.com/images/data/hsr1425cr.pdf HSR-1425CR Continuous Rotation Servo Datasheet] |
||
*[http://people.wallawalla.edu/~Rob.Frohne/ClassHandouts/Assembly/Robot_Schematics.pdf Schematics] These are rather crude schematics of the robot circuit board. There are two cuts and jumps that are not reflected, at least on the last one. The effect is to change the photo transistors from a common emitter to a common collector configuration. You can see the change scratched in just below the word Fairchild on the hand drawn schematic. Basically the resistor and photo transistor are reversed in order. I believe both photo transistors are swapped to common collector configuration. |
*[http://people.wallawalla.edu/~Rob.Frohne/ClassHandouts/Assembly/Robot_Schematics.pdf Schematics] These are rather crude schematics of the robot circuit board. There are two cuts and jumps that are not reflected, at least on the last one. The effect is to change the photo transistors from a common emitter to a common collector configuration. You can see the change scratched in just below the word Fairchild on the hand drawn schematic. Basically the resistor and photo transistor are reversed in order. I believe both photo transistors are swapped to common collector configuration. |
||
====2015 Robot Information==== |
|||
*[[Building Tips]] |
|||
*[https://www.creatroninc.com/upload/L9110%20Datasheet.pdf L9110 H Bridge Data Sheet] |
|||
**[http://www.petervis.com/modules/l9110-hg7881-dual-channel-stepper-motor-driver-board/l9110-hg7881-dual-channel-stepper-motor-driver-board.html HG7881 Dual H Bridge Module] This suggests putting the PWM signal on one input and the direction control on the other. If you do that, you need to invert the PWM input when you change directions as well. See the data sheet above. |
|||
*[http://wiki.pinguino.cc/index.php/SPP_Bluetooth_Modules#HC-05.2C_HC-06_Hardware Bluetooth UART HC-05 and HC-06] |
|||
**[http://www.tec.reutlingen-university.de/uploads/media/DatenblattHC-05_BT-Modul.pdf HC Bluetooth Manual] |
|||
**[[C example of using the USCI as a 9600 baud UART to communicate with the HC-06 bluetooth module for the MSP430F5529]] |
|||
**[https://en.wikipedia.org/wiki/Newline Newline Characters, CR or CR+LF?] It is important to know what the computer you are communicating with uses. Linux and Unix use LF (\n or 0x0a ). Windows uses CR+LF (\r \n or 0x0d0a). Others use different combinations! |
|||
*[https://github.com/Nurgak/Android-Bluetooth-Remote-Control Blueberry Android Bluetooth Remote Control App] |
|||
*[http://www.hyzt.com/manager/upimg/hy301%E2%80%9407A.pdf HY301-07A Photo Interrupter Datasheet] From the datasheet, we will choose a forward current on the LED to be 5 mA because we don't want to waste batteries, and that is the lowest the data sheet shows it working. That leads us to a forward voltage across the diode of 1.3 volts. If we run things on 3.3 volts that gives us a voltage drop of 3.3-1.3=2.0 volts. Ohms law says a resistor of R=V/I=2volts/5mA = 400 ohms. We will pick 390 ohms since it is an available 5% value. For the phototransistor, we see that the current for the forward diode current we picked should be about 0.2 mA. If we want the output to drop to 0.5 volts with the LED on, that leaves 3.3 volts - 0.5 volts = 2.8 volts across the collector resistor, so using Ohm's Law again, we need a collector resistor of 2.8 volts/0.2mA = 14 Kohms, so we will pick 15 Kohms because it is a standard value. The 15 Kohm resistors are optional as you can use the built in ones on the MSP430 controlled by PREN. |
|||
*I count 20 holes, on the encoder wheels. This gives 20 periods per revolution. The wheel diameter is about 0.066 meters, so the radius is 0.033 meters. This gives about 0.21 meters per revolution. It seems a pretty fast speed is about 1 meter per second, which means that we have about 5 revolutions per second, or 100 cycles per second, or about 0.01 seconds per period at high speed. |
|||
*[http://www.phidgets.com/docs/DC_Motor_and_Controller_Primer Applying Feedback] makes the robot easier to control. This web page gives a somewhat helpful primer on that process. |
|||
==Logic Analyzer Information== |
|||
These logic analyzers are clones of the original [https://www.saleae.com/ Saleae] analyzer. They have software compatible with this analyzer, but they don't like you to use it. |
These logic analyzers are clones of the original [https://www.saleae.com/ Saleae] analyzer. They have software compatible with this analyzer, but they don't like you to use it. |
||
[[Image:Logic_Analyzer.png|thumb ]] |
|||
*[http://sigrok.org/ The Sigrok project] provides open source software for this logic analyzer and other laboratory instruments. I recommend this software. The latest features can be had by compiling from the source code. |
*[http://sigrok.org/ The Sigrok project] provides open source software for this logic analyzer and other laboratory instruments. I recommend this software. The latest features can be had by compiling from the source code. |
||
**[http://sigrok.org/wiki/Downloads Sigrok software downloads] are here. It runs on Linux, Windows, OS X and even Android, as well as FreeBSD and a bunch of other operating systems. |
**[http://sigrok.org/wiki/Downloads Sigrok software downloads] are here. It runs on Linux, Windows, OS X and even Android, as well as FreeBSD and a bunch of other operating systems. |
||
**[http://sigrok.org/wiki/Building Here are instructions to build from source.] |
**[http://sigrok.org/wiki/Building Here are instructions to build from source.] |
||
===Digital Logic Links=== |
|||
[[Image:Logic_Analyzer.png|thumb|widthpx|450 ]] |
|||
*[http://www.falstad.com/circuit/e-nandff.html Set Reset Latch Animation] |
|||
===Other Miscellaneous Interesting Reading===*[http://kysmykseka.net/koti/wizardry/Programming/Misc/Charles%20Petzold%20-%20Code%20-%20The%20Hidden%20Language%20of%20Computer%20Hardware%20and%20Software.pdf Code: The Hidden Language of Computer Hardware and Software by Charles Petzold] This is a good read about the history of the subject which gives the reader a good understanding of the subject. |
|||
*[http://www.falstad.com/circuit/e-masterslaveff.html Master-Slave D Flip Flop Animation] |
|||
==ARM7 Links== |
|||
*[http://people.wallawalla.edu/~larry.aamodt/cptr215/cptr215.html Dr. Aamodt's Assembly Language Web Page] |
|||
*[http://www.eng.auburn.edu/~nelson/courses/elec5260_6260/ARM_AssyLang.pdf ARM Assembly Language Programming], a free book by Knaggs and Welsh (2004 Edition). This book is quite useful. It is a better as a reference than our text. |
|||
*[http://home.cc.umanitoba.ca/~umzhouc/arm.html Another text in html format.] |
|||
*[http://www.ic.unicamp.br/~ranido/mc404/arm/arm-instructionset.pdf The ARM Instruction Set], a good reference work. |
|||
*[ftp://entc.tamu.edu/ENTC349/Reference%20Material/ARM/ARM%20Assembly%20Language%20-%20Knaggs%20&%20Welsh.pdf Knaggs and Welsh (2008 Edition)]. |
|||
*[http://www.heyrick.co.uk/assembler/qfinder.html ARM Instruction Set Quick Finder] |
|||
*[http://ozark.hendrix.edu/~burch/cs/230/arm-ref.pdf ARM Instructions Quick Reference Card] |
|||
*[http://www.keil.com/support/man/docs/armasm/ Keil ARM Assembler Manual] |
|||
*[http://www.altera.com/literature/third-party/archives/ddi0100e_arm_arm.pdf This reference tells in more detail what happens to the flags, etc. for each instruction.] |
|||
*[https://en.wikipedia.org/wiki/Bitwise_operation Bit Operations Explained] |
|||
*[[Code Examples from Class]] |
|||
*[http://www.microbuilder.eu/Tutorials/LPC2148.aspx Using the I/O on the LPC2148] |
|||
*[http://www.nxp.com/documents/application_note/AN10216.pdf I2C Interfacing and comparison of serial protocols] |
|||
*[http://infocenter.arm.com/ The ARM Info Center] is a good reference site. |
|||
*[http://people.wallawalla.edu/~larry.aamodt/cptr215/docs/arm/arm_7tdmi_arch.pdf The ARM7 Reference Manual] is the go to reference. |
|||
*[http://people.wallawalla.edu/~larry.aamodt/cptr215/campus-only/lpc2148_uguide_ver3_0_rev_c.pdf The Embedded Arts Board of Education Reference Manual] gives the details of the board we are using in class. |
|||
*[http://people.wallawalla.edu/~larry.aamodt/cptr215/docs/arm/nxp_lpc214x_um.pdf LPC214x Reference Manual] This guide is immensely useful for programming the peripherals. |
|||
*[http://infocenter.arm.com/help/index.jsp?topic=/com.arm.doc.dui0489c/index.html ARM Compiler Toolchain Reference Manual] |
|||
*[https://www.scss.tcd.ie/~waldroj/3d1/arm_arm.pdf ARM Reference Manual] Section A of this manual is the most use. |
|||
===Raspberry Pi=== |
|||
Depending on the version, your pi may use ARM6 or ARM7. There is actually quite a lot of good assembly language information for programming the raspberry pi. |
|||
*[http://www.microdigitaled.com/ARM/ASM_ARM/Software/ARM_Assembly_Programming_Using_Raspberry_Pi_GUI.pdf This document shows how to use gnu tools from the command line (even over ssh if you have no display handy) and then how to use the Code::Blocks IDE for Raspberry Pi Assembly programming.] This also seems to apply to the Odroid C1 board running Ubuntu and probably other Odroid boards as well. |
|||
==Other Miscellaneous Interesting Reading== |
|||
*[http://kysmykseka.net/koti/wizardry/Programming/Misc/Charles%20Petzold%20-%20Code%20-%20The%20Hidden%20Language%20of%20Computer%20Hardware%20and%20Software.pdf Code: The Hidden Language of Computer Hardware and Software by Charles Petzold] This is a good read about the history of the subject which gives the reader a good understanding of the subject. |
|||
*[http://www.ee.surrey.ac.uk/Teaching/Unix/index.html Unix and Linux Command Line Tutorial] |
|||
*[http://linuxcommand.org/lc3_learning_the_shell.php Another Linux/Unix Shell Tutorial] |
|||
Latest revision as of 17:31, 13 December 2016
TI MSP430 Links
- MSP430 Family Details This is a good quick overview of the MSP430.
- MSP430 Family Instruction Set Details This is a good way to find out what each instruction is actually doing. It has the abbreviated instructions information, but then after that are the gory details we all need, especially when first learning the MSP430 assembly language.
- MSP430 Family Archatecture and Module Guide (The manual that the above Instruction Set Details came from). This was written before the MSP430X processors like our MSP430F5529 were conceived, so some data is outdated.
- Addressing Modes of the MSP430 Family
Toolchain
There are various toolchains (build tools) for the MSP430. TI provides the Code Composer Studio (both desktop, and browser based) toolchain. At this point, the desktop version is much more powerful than the browser based version, and you need it for this class. There are also some other toolchains that cost something, but I prefer Code Composer Studio.
Code Composer Studio
- CCS will work with Linux and Windows, and now a beta is available for OS X.
- To install CCSV6.1 on Ubuntu 15.04, you need to
$ unset JAVA_TOOL_OPTIONS
before running the installer. There is some more information for Linux installs here. I also found out that installing Grace from the App Center makes the App Center blank thereafter, unless you reinstall CCSV6.1.
- Code Composer Studio 6 for MSP430 User's Guide
- 73 Short Videos on using Code Composer Studio
- TI Cloud Tools This includes CCS Cloud which allows you to compile ,flash, and even debug. It seems to be under rather rapid development, so though it is missing a number of features of the local IDE, it may receive those any time.
- OS X Native Toolchain Installer (You may prefer the Code Composer Studio Beta linked above.)
MSP430 Assembly using the TI Assembler
- Assembly Language Tools This manual also has some good data on the linker, including the section "Using Linker Symbols in C/C++ Applications".
- Assembler Directives
MSP430 TI C Compiler
- MSP430 Optimizing C/C++ Compiler (See Section 6.5 and following for how to mix C/C++ and Assembly. It is really best to read the entire chapter though, as it is all pertinent to mixing C and Assembly. It will also help you if you want to program in C, as it tells how the C compiler uses the memory, the stack, the registers, etc., and once you understand the processor as you learn to do when you learn its assembly language, it is very interesting to see how that all works in C.)
- Here is how to use printf() statements with Code Composer Studio.
- TI C Examples Workspace This is a CCS workspace with all the C examples from TI for the MSP430F5529. It is useful to work around a bug in MSPWare that broke the feature that you could use in the Examples to create an instance of an example in your workspace. You can import projects from this workspace into your regular one, so you don't have to switch workspaces to see the examples. You can read the descriptions for these examples in the Examples feature of Code Composer Studio. You just can't import them into your workspace until TI fixes the bug. When they do, this will no longer be useful. Soon I hope!
IAR Tools
IAR also makes a toolchain. It is not free, but you will sometimes find code that was developed for it, and it is slightly different from that developed for Code Composer Studio using either the TI or GCC compilers/assemblers.
- This is a perl script to convert IAR assembly code to TI assembly code.
GCC Compiler
You may use the GCC compiler from within Code Composer Studio. It is not limited in the size of the code that it can compile. There are some differences between it and the TI compiler. I find that the TI compiler usually works more easily, with TI examples especially.
- Some notes on getting the GCC compiler to work with the CC3100....
- An Example of Assembly with the GCC Compiler
- Generate the assembly code with GCC
- Inline Assembly with GCC
To make your program using interrupt service routines compile with either the TI or the GCC compiler, you need some #ifdef's like this:
#if defined(__TI_COMPILER_VERSION__) || defined(__IAR_SYSTEMS_ICC__)
#pragma vector=USCI_A0_VECTOR
__interrupt void USCI_A0_ISR(void)
#elif defined(__GNUC__)
void __attribute__ ((interrupt(USCI_A0_VECTOR))) USCI_A0_ISR (void)
#else
#error Compiler not supported!
#endif
Note that you need to substitute the appropriate ISR vectors in your code.
C Language References
- Kerningham & Richie's famous book, The C Programming Language.
Translating Embedded Code Between Assembly and C
When reading C code to understand what you wish to do in Assembly, or vice versa, it is handy to understand some common statements you see in C. Listed below are the most commonly seen ones.
 P1DIR |= #BIT0;  //is the same as bis.b #BIT0, &P1DIR
 P1DIR &= ~#BIT0;  //is the same as bic.b #BIT0, &P1DIR
 P1DIR ^= #BIT0;   //is the same as xor.b #BIT0, &P1DIR
MSP430F5529 Specific Data
- MSP430x5xx and MSP430x6xx Family User's Guide This is the most important reference for the MSP430F5529. Read it carefully (as a reference).
- MSP430F5529 Data Sheet
- TI web page on the MSP430F5529
- MSP430F5529 Memory Map is in the ti/ccsv6/ccs_base/msp430/include/msp430f5529.cmd file.
- Setting the clock frequency for the MSP430F5529 Launchpad
- Some notes on porting MSP430G2553 code to the MSP430F5529. Here is a TI App Note on the differences between the 5xxx and the previous MSP430 processors. Note: There are differences in the following:
- The F5xxx has USB and a bunch more features.
- The F5xxx doesn't have PxSEL2, and the PxSEL need to be adjusted because of different pinouts. I find pages 25-28 of the MSP430F5529 Launchpad Manual useful for these conversions.
- The PMM (Power Management Module), particualarly the Digitally Controlled Oscillator (DCO) and Frequency Locked Loop (FLL) of the clock system is significantly different.
- The USCI (UART, SPI and I2C serial communications) Interrupts have been consolidated. For example see section 39.3.15 of the MSP430x5xx and MSP430x6xx Family User's Guide.
- The MSP430F5529 has more than 128K of memory. The normal 16 bits will only allow accessing the first 64K. To access the rest it uses 20 bits. This is enabled with the Extended Instructions like MOVX.W. For class, we can get by with the lower 64K just fine and can ignore these extended instructions, however, good programming practice calls for using CALLA, RETA, and BRA instead of CALL, RET, and BR. If you want to use the rest of the memory sometime, look into this. If you want C you compile to make assembly without using the extended instructions using CCSv6, tell it to use the msp instructions instead of mspx in the Build->MSP430 Compiler->Processor Options.
- How to set up an assembly project in Code Composer Studio
Launchpad Evaluation Board Data
- MSP430F5529LP LaunchPad Evaluation Kit Resource Page
- TI MSP430F5529 Launchpad Wiki Page This page has the nice pin out card that came with your Launchpad.

Code Examples from Class
Slides and Videos 2015 and 2016
These slides were modified from Mark Clement's work at BYU. The slides are the major categories, and the videos explaining the slides are the sub-categories.
- Digital Logic
- Arithmetic and Logical Operations
- Transistors Make a Digital Gate
- Translating Between Truth Tables, Logic Diagrams and Boolean Equations
- Commonly Used Combinational Logic
- Logical Completeness
- Sequential Logic, Latches, Registers and Memory
- Finite State Machines
- Finite State Machine Examples
- Finite State Machine Design
- Data Types
- Instruction Set Archatecture
- Introduction to the MSP430 Instruction Set Architecture
- MSP430 Assembly Language Primer
- MSP430 Addressing Modes
- MSP430 Source Addressing Modes
- What Happens When Using Different MSP430 Addressing Modes?
- Processor Speed and Addressing
- MSP430 Dissassembly
- How Addressing Modes and Data Types Work Seen With Code Composer Studio
- Assembler & Linker
- General Purpose I/O
- Stacks
- MSP430 Interrupts, Clocks, Timers, and PWM
- Serial Communications
- Using Flash
Quiz Answers
Materials for the MSP430 Family from Other Courses
- Notes from the University of Texas at El Paso (UTEP) The EE3376 class.
- Binary Numbering Systems and Operations
- Assembly Instructions
- MSP430 Assembly Instruction Set Architecture
- The Stack, Interrupts, and the FIFO Buffer
- Data Structures
- Hardware Interfacing
- Timers
- Universal Serial Communication Interface (USCI)
- Analog to Digital Conversion
- Instruction Set Quick Reference Guide
- Addressing Modes of the MSP430
- Brigham Young University CS224 This is a very in depth and good reference for learning the MSP430.
- MSP430 Software Coding Techniques (best practices for low power consumption)
- ECE382, a good self learning site for the MSP430
- Berkeley's MOOC where they build a robot using the MSP430 Launchpad (G2 version).
- A Beginner's MSP430 Assembly Language Tutorial
- Launchpad Workshop
- Interrupts
- Using Port Pin Interrupts
- MSP430 Assembly Language Tutorial
- Assembly Language Lecture I like the looping flow charts and their equivalents in assembly.
- A large and comprehensive set of lab experiments and code....
- Assembler, Linker, and Loader
- Gustavo Litovsky's great set of tutorials on the MSP430 Pick the latest one. There is some good information on using peripherals, though all in C.
- Assembly Language, the Basics
- MSP430 Microcontroller Basics, by John Davies
- How Flash works, and how you can write to it from your program.
- MSP430 LaunchPad Tutorials
- The carry (C) and overflow (V) flags explained.
Project Related Links and Notes
2015 Robot and 2016 Car Information
- Building Tips
- L9110 H Bridge Data Sheet
- HG7881 Dual H Bridge Module This suggests putting the PWM signal on one input and the direction control on the other. If you do that, you need to invert the PWM input when you change directions as well. See the data sheet above.
- How to use the HG7881 (L9110) Dual Channel Motor Driver Module This reference shows you actual arduino code that runs the dual channel H bridge.
- Bluetooth UART HC-05 and HC-06
- HC Bluetooth Manual
- The bluetooth module for 2016 is a little different:
- It uses the BK3231 IC and it's data sheet is available from the FCC here.
- It is the SPP-C module described on this page.
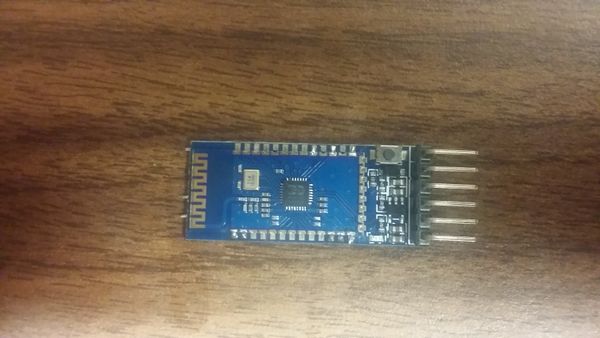
- Solder five pins on one side and three on the other to get your bluetooth module onto your carrier board.
- These are the AT commands which if you use them to configure your bluetooth have to be issued from the wired side (not from the phone). You can use them to change the name with "AT+NAME<Name you want to use instead of BT-04A>" where I found for me sending a line feed after this was needed. The name you want to call you bluetooth device is just typed after the AT+NAME, like AT+NAMERob if I want to call it Rob. I should note that I had some difficulty with this. I don't seem to know how to terminate the name, but this may get you started. It is not handy to have your bluetooth device named the same thing as everyone elses when you are in the same room trying to pair with it.
- The baud rate to start with on these boards is 9600, 8N1. You need to send carriage return and line-feed both to get a response from the board. Remember that TX on one side is connected to RX on the other. The module identifies itself as BT04-A, and the PIN is 1234 over bluetooth.

- C example of using the USCI as a 9600 baud UART to communicate with the HC-06 bluetooth module for the MSP430F5529. To test this app, do not use Blueberry. The professor used Bluetooth terminal on f-droid. The source code is available at github.
- Newline Characters, CR or CR+LF? It is important to know what the computer you are communicating with uses. Linux and Unix use LF (\n or 0x0a ). Windows uses CR+LF (\r \n or 0x0d0a). Others use different combinations!
- Blueberry Android Bluetooth Remote Control App
- HY301-07A Photo Interrupter Datasheet From the datasheet, we will choose a forward current on the LED to be 5 mA because we don't want to waste batteries, and that is the lowest the data sheet shows it working. That leads us to a forward voltage across the diode of 1.3 volts. If we run things on 3.3 volts that gives us a voltage drop of 3.3-1.3=2.0 volts. Ohms law says a resistor of R=V/I=2volts/5mA = 400 ohms. We will pick 390 ohms since it is an available 5% value. For the phototransistor, we see that the current for the forward diode current we picked should be about 0.2 mA. If we want the output to drop to 0.5 volts with the LED on, that leaves 3.3 volts - 0.5 volts = 2.8 volts across the collector resistor, so using Ohm's Law again, we need a collector resistor of 2.8 volts/0.2mA = 14 Kohms, so we will pick 15 Kohms because it is a standard value. The 15 Kohm resistors are optional as you can use the built in ones on the MSP430 controlled by PREN.
- I count 20 holes, on the encoder wheels. This gives 20 periods per revolution. The wheel diameter is about 0.066 meters, so the radius is 0.033 meters. This gives about 0.21 meters per revolution. It seems a pretty fast speed is about 1 meter per second, which means that we have about 5 revolutions per second, or 100 cycles per second, or about 0.01 seconds per period at high speed.
- Applying Feedback makes the robot easier to control. This web page gives a somewhat helpful primer on that process.
CC3100 SimpleLink Wi-Fi Family
- CC3100 BoosterPack Getting Started Guide
- A link to the Internet of Things Whitepaper
- CC3100 Data Sheet
- Getting Started With the CC3100 There is a nice video tutorial on this page.
- Linux and the CC3100
- Here are the files for compiling SimpleLink using the GCC compiler.
2014 Robot Information
- HSR-1425CR Continuous Rotation Servo Datasheet
- Schematics These are rather crude schematics of the robot circuit board. There are two cuts and jumps that are not reflected, at least on the last one. The effect is to change the photo transistors from a common emitter to a common collector configuration. You can see the change scratched in just below the word Fairchild on the hand drawn schematic. Basically the resistor and photo transistor are reversed in order. I believe both photo transistors are swapped to common collector configuration.
Logic Analyzer Information
These logic analyzers are clones of the original Saleae analyzer. They have software compatible with this analyzer, but they don't like you to use it.

- The Sigrok project provides open source software for this logic analyzer and other laboratory instruments. I recommend this software. The latest features can be had by compiling from the source code.
- Sigrok software downloads are here. It runs on Linux, Windows, OS X and even Android, as well as FreeBSD and a bunch of other operating systems.
- Here are instructions to build from source.
Digital Logic Links
ARM7 Links
- Dr. Aamodt's Assembly Language Web Page
- ARM Assembly Language Programming, a free book by Knaggs and Welsh (2004 Edition). This book is quite useful. It is a better as a reference than our text.
- Another text in html format.
- The ARM Instruction Set, a good reference work.
- Knaggs and Welsh (2008 Edition).
- ARM Instruction Set Quick Finder
- ARM Instructions Quick Reference Card
- Keil ARM Assembler Manual
- This reference tells in more detail what happens to the flags, etc. for each instruction.
- Bit Operations Explained
- Code Examples from Class
- Using the I/O on the LPC2148
- I2C Interfacing and comparison of serial protocols
- The ARM Info Center is a good reference site.
- The ARM7 Reference Manual is the go to reference.
- The Embedded Arts Board of Education Reference Manual gives the details of the board we are using in class.
- LPC214x Reference Manual This guide is immensely useful for programming the peripherals.
- ARM Compiler Toolchain Reference Manual
- ARM Reference Manual Section A of this manual is the most use.
Raspberry Pi
Depending on the version, your pi may use ARM6 or ARM7. There is actually quite a lot of good assembly language information for programming the raspberry pi.
- This document shows how to use gnu tools from the command line (even over ssh if you have no display handy) and then how to use the Code::Blocks IDE for Raspberry Pi Assembly programming. This also seems to apply to the Odroid C1 board running Ubuntu and probably other Odroid boards as well.
Other Miscellaneous Interesting Reading
- Code: The Hidden Language of Computer Hardware and Software by Charles Petzold This is a good read about the history of the subject which gives the reader a good understanding of the subject.
- Unix and Linux Command Line Tutorial
- Another Linux/Unix Shell Tutorial